Early spring is the perfect time to repot your houseplants to prepare them for the growing season. It is also an ideal time to make baby plants by taking cuttings or dividing, so that you can share or trade your favorite plants with friends and family. Because who doesn’t need more plants?!
Here is a helpful guide explaining the different ways to propagate plants. This will help you through the process of encouraging your house plants to multiply and prosper!
CUTTINGS
Stem Cutting
- Good for many herbaceous houseplants, especially trailing/vining varieties
- Pothos, philodendron, tradescantia, smaller monstera varieties
- New growth will arise from exposed leaf nodes, stem cutting will become part of new plant
- Cut a 3”-5” section of stem that includes leaves & nodes. Best on stems <1yr old
- Keep track of which side of the stem is the top and bottom!
- Remove leaves from lowest ⅓
- Rooting hormone generally not necessary for stem cuttings, but can be applied to the nodes where the lower leaves were removed if desired.
- Stick the bottom ⅓-½ of the stem cutting into moist potting media *AT LEAST ONE leaf node must be burried
Leaf Cutting
- Good for plants with short/no stems, and when there is limited parent plant material to work with.
- Use for Snakeplant, African violet, Peperomia, Christmas cactus, Jade plant, larger monstera varieties
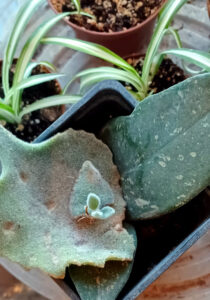
- New growth will arise from the base. Leaf cutting will not be part of the new plant
- Cut one leaf + petiole (leaf stem). Include <1.5” of petiole
- -For plants with NO petiole (ex: Snakeplant): Cut the leaf into 3”-4” sections. Make a mark on each section to help you remember which side goes up!
- Dip the bottom of the petiole (or leaf section) into rooting hormone, and stick into moist potting media
DIVISION
Crown Division
- Useful for most plants that grow in a clumping habit, with many shoots emerging from the crown. This includes: Asparagus & Boston fern, Tradescantia, Peace lily, Chinese evergreen, Jade lant, Parlor palm, many more
- Can create 2 (or more) decent sized, fully rooted plants from a single parent plant
- Carefully remove the plant & root ball from it’s pot
- Using a soil knife or sharp spade/trowel, cut through the roots and crown of the plant, so that each side has equal roots and crown/leaves.
- Re-pot each section separately, and water in.
LAYERING
- New plant grows while still attached to the parent plant! Less stressful for baby plants. Especially useful for plants that are woody or difficult to root, and for plants that produce runners or offsets.
Simple Layering
- Useful for vines/trailing plants like Philodendron, Pothos, English ivy, Spider plant, Jasmin
- Bend a stem down to the soil, WITHOUT CUTTING THE STEM, bury a section that includes at least one node
- May need to secure stem under the planting media with a staple or weight
- Roots & leaves will form at the buried node to create a new plant. Once this happens, the parent stem can be severed.
Natural Layering
Natural layering refers to the ability of some plants to perform simple layering naturally, with the use of runners or offsets.
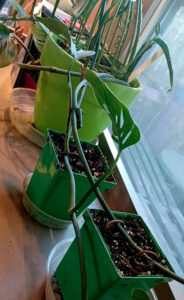
- A runner is a baby plant that forms on a specialized stem, which will root when it has contact with soil (ex: Spider plant, strawberries)
- Offsets are common in plants that grow in rosettes (think bromeliads and succulents like aloe)–baby plants form and root at the base of the main rosette
- Runners and offsets can be rooted while still attached to the parent plant, or they can be cut from the parent plant and *rooted as a cutting
Air Layering
- Useful for woody/semi-woody plants including: Ficus, Rubber plant, Schefflera, Hibiscus, Croton, Dieffenbachia, Dracaena
- This is the most complicated method we will cover.. Fastest way to get a fairly large new plant when crown division isn’t an option.
- Unlike other forms of layering, air layering basically turns a fairly large existing section of the parent plant into a new plant with it’s own roots (rather than encouraging an entirely new plant to form)
- Select a section of the plant where the stem is about ½”-3/4” in diameter.
- Using a sharp knife, carefully the remove about 1” of bark, all the way around the stem (this is called girdling)
- Apply rooting hormone to the girdled branch
- Using roughly two handfuls of sphagnum moss (which has been soaked in water and wrung out), enclose the entire wounded area.
- Use twine or string to secure the moss in place if necessary.
- Use a square of plastic wrap to completely encase the moss. Use twine to secure the plastic wrap to the moss ball, and tie off at the top and bottom, to keep moisture from escaping
- Wrap the moss/plastic wrap in aluminum foil to keep light out
- Roots will develop from the part of the stem that was girdled. Once a decent amount of roots have formed, make a cut BELOW the moss ball to remove the new plant from the parent.
- Remove the foil, plastic wrap, and twine. Plant your new, rooted plant in potting media and water in.
GENERAL TIPS FOR TAKING SUCCESSFUL PROPAGATION
(+EXCEPTIONS FOR SUCCULENTS)
- Always use clean, sharp tools!
- Clean your tools with rubbing alcohol between uses
- Air temperature should be between 68-85 degrees
- Planting media should be between 65-80 degrees. Ideal temperature=72-75 degrees
- A bottom heating mat may be useful during colder months
- Planting media should be loose and well draining.
- Look for soilless mixtures that combine perlite, vermiculite, peat moss, and/or coco coir.
- Planting media should be kept consistently moist, but not soggy
- Until roots begin to develop (first couple of weeks), misting with a spray bottle is often a good method to keep the top layer of media moist, without adding excess moisture
- Maintain high humidity > 75% until roots begin to form
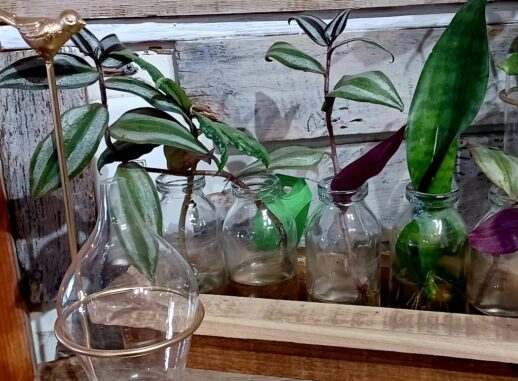
- –Cover cuttings with plastic wrap or a sandwich bag, use a mini greenhouse, a jar, an aquarium
- Once roots form and you see the first signs of new growth on the cutting, slowly reduce humidity and increase airflow until baby plant is in open air
- -Open mini-greenhouse vents, loosen or poke holes in plastic wrap
- Avoid harsh, direct sunlight; filtered light is perfect for baby plants as they develop roots and become established
- Be patient! If at first you don’t succeed, try again! Have fun!
EXCEPTIONS FOR SUCCULENTS
- When taking cuttings of succulents, let the cutting sit out on the counter for a few days (after it’s been clipped from the parent plant) before sticking into potting media. This allows a callous to partially form over the cut, which helps prevent rot issues
- Well draining soil is especially essential for succulents
More Resources:
- General propagation info + plant list: https://extension.missouri.edu/publications/g6560
- More info about different types of leaf cuttings: https://content.ces.ncsu.edu/plant-propagation-by-leaf-cane-and-root-cuttings-instructions-for-the-home-gardener